2018년 12월 18일 화요일

Build a LTE Network with srsLTE and Program Your Own USIM Card (from https://cyberloginit.com/2018/05/03/build-a-lte-network-with-srslte-and-program-your-own-usim-card.html)

Build a LTE Network with srsLTE and Program Your Own USIM Card

LTE

Requirements

  • A Linux (preferably Ubuntu 16.04.4 desktop 64-bit) machine (i5 Dual-Core CPU will do, preferably with a USB 3.0 port)
  • A Software-defined radio (SDR) board with Ettus Universal Hardware Driver (UHD) or the bladeRF driver support, like USRP B210
  • A Windows machine to run the closed source USIM card programming software
  • PC/SC compatible SIM card reader, like the MCR3512
  • A USIM card compatible with the programming software
  • A LTE handset, like the Oneplus One

Build

srsLTE is a free and open-source LTE software suite developed by SRS (www.softwareradiosystems.com).
Of the three well-known open source LTE stack(openLTE, srsLTE and OpenAirInterface), I find srsLTE have both the code elegance of openLTE and the completeness of OpenAirInterface.
With srsLTE, we are able to run a LTE network(eNodeB, MME, HSS and S/P-GW) on a single pc.
On a freshly installed 64-bit Ubuntu 16.04.4 desktop machine, install the required libraries with:
sudo apt-get install cmake libfftw3-dev libmbedtls-dev libboost-program-options-dev libconfig++-dev libsctp-dev

Then install the UHD driver for our USRP B210:
sudo apt-get install libuhd-dev libuhd003 uhd-host
Next, download and build srsLTE in the home directory with a non-root user:
cd ~
git clone https://github.com/srsLTE/srsLTE.git
cd srsLTE
mkdir build
cd build
cmake ../
make
make test
sudo make install

uhd install

# install bin images
sudo python /usr/lib/uhd/utils/uhd_images_downloader.py 
sudo ldconfig
# check its validity
uhd_find_devices 
uhd_find_devices 


Configuration

Change back to the source directory.
cd ~/srsLTE

srsEPC

cp srsepc/epc.conf.example srsepc/epc.conf
cp srsepc/user_db.csv.example srsepc/user_db.csv

srsENB

cp srsenb/enb.conf.example srsenb/enb.conf
cp srsenb/rr.conf.example srsenb/rr.conf
cp srsenb/sib.conf.example srsenb/sib.conf
cp srsenb/drb.conf.example srsenb/drb.conf

 Run

cd ~/srsLTE/srsepc
sudo srsepc epc.conf
Open another terminal:
cd ~/srsLTE/srsenb
sudo srsenb enb.conf
You can also tweak the epc.conf or the enb.conf file, like change the MCC and the MNC, or the DNS address.
Note: The UE database file(user_db.csv) has to be within the same directory where you would run the srsepc command.
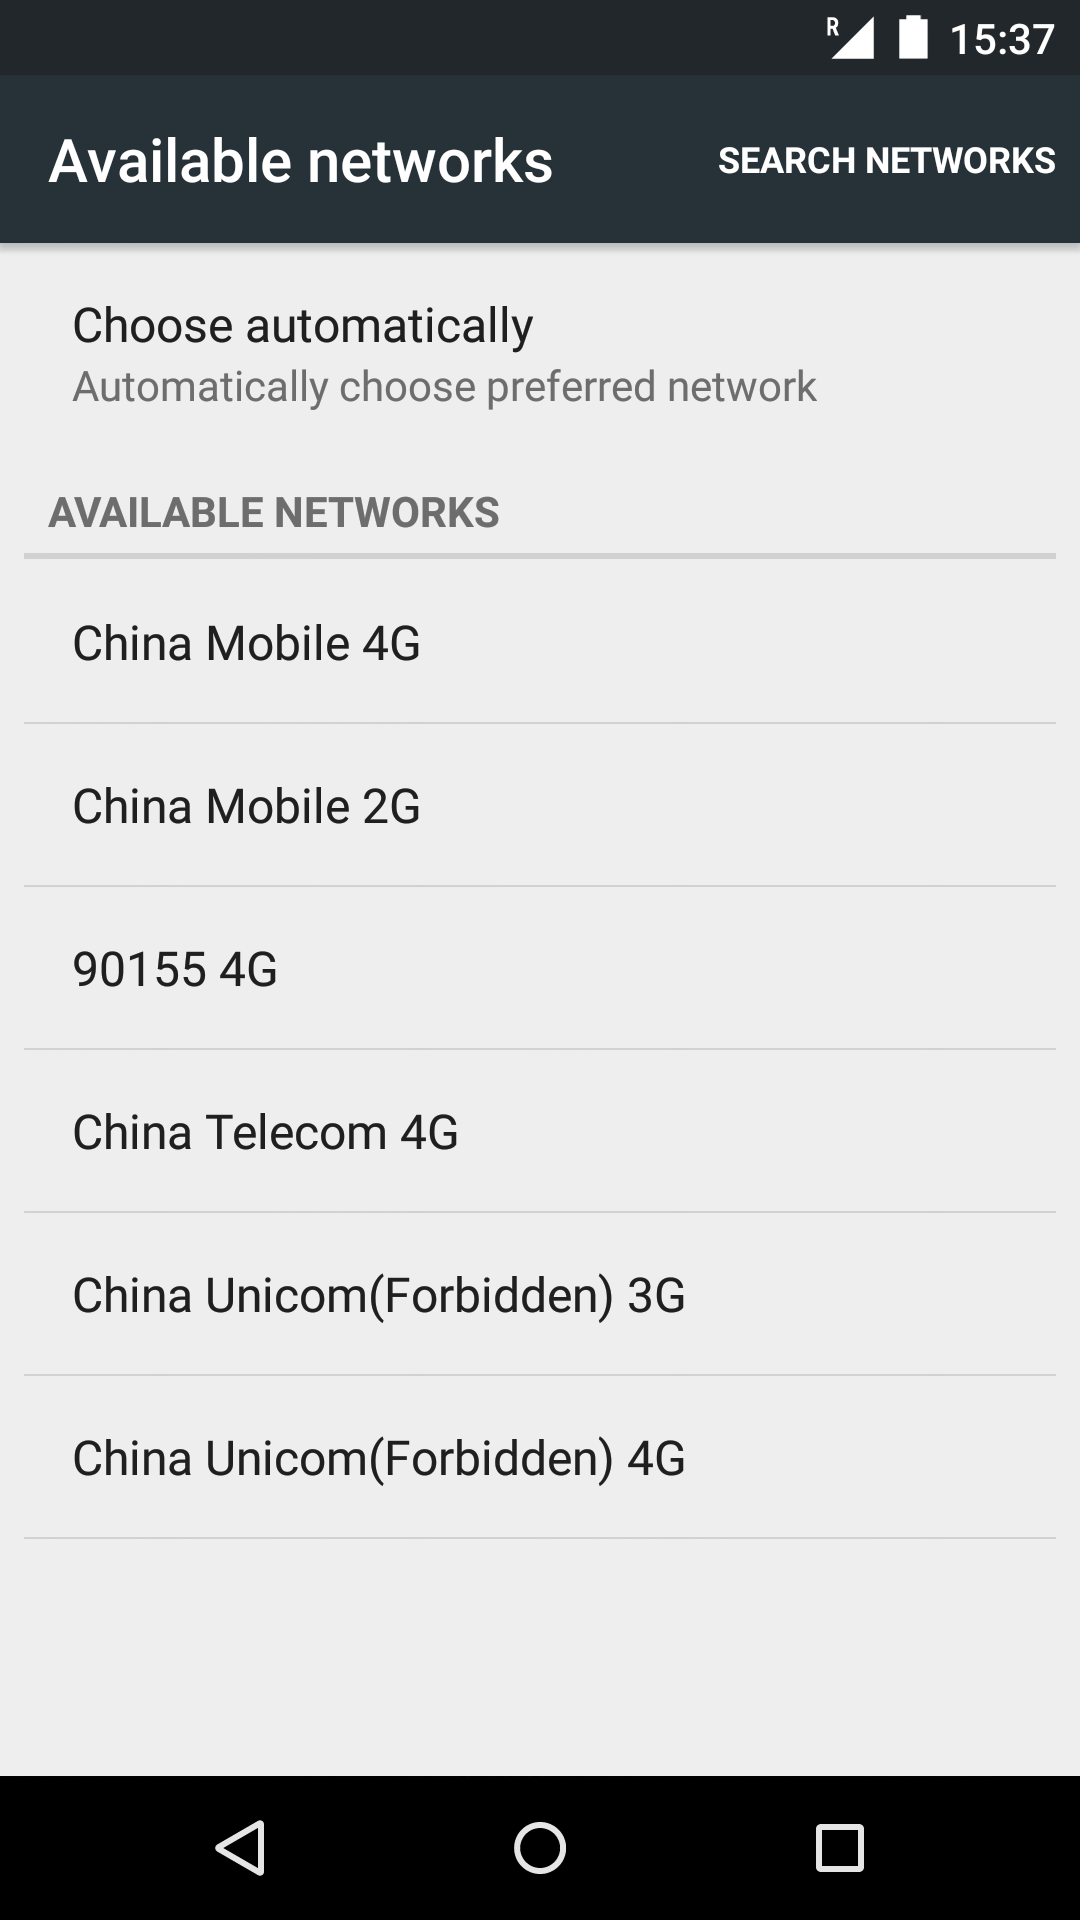
Search ‘Available networks’ from your phone, and you should seen the custom built 4G network among local networks.
Networks

USIM Card

USIM card is a complex closed system.
Usually, you will not be able to program a blank USIM card bought online with a open source software like pySim, because different manufacturers have different implementations for the USIM standard.
If you do not have USIM cards supported by pySIM, like sysmoUSIM-SJS1, GrcardSIM, GrcardSIM2 and MagicSIM, a closed source software is needed, and most of the time, it is based on Windows.
Another way is to simply ask the seller to program the USIM cards for you. Both eBay and Taobao have plenty of them.
Just make sure the parameters: ICCID, IMSI, KI and OP/OPc are programmed accordingly.

Save 150¥

I bought a USIM card from Taobao which costs me 30¥. The USIM card reader and the programming software combined costs up to 150¥.
USIM
Note: If this link should fail, just search ‘openlte’ from Taobao.
So it seems that I will have to spend at least 180¥ for this.
Not so fast!
After digging through CSDN, a programmer website in China, I found a interesting article.
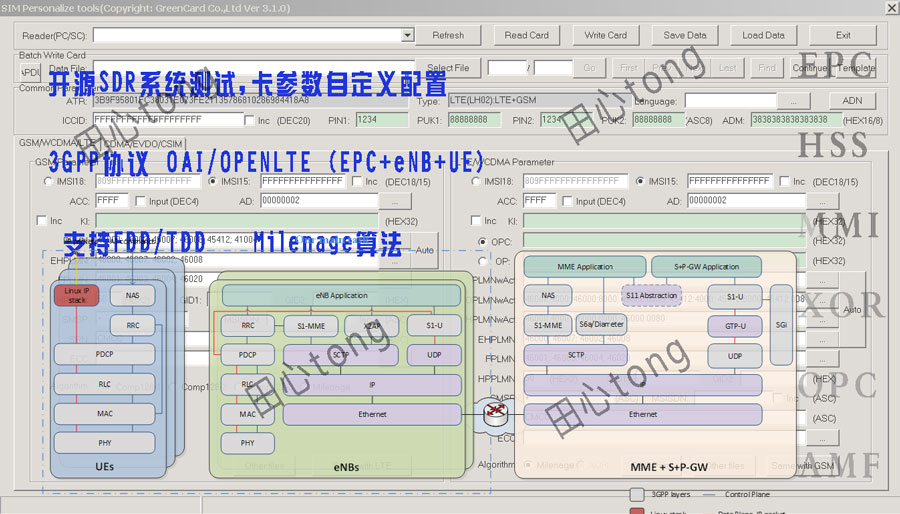
The USIM programming software used by the blogger is the same as the picture from the Taobao shop, although the later one is heavily watermarked.
USIM programming software
Both screenshots show that the USIM programming software is called SIM Personalize tools(Copyright: GreenCard Co.,Ltd Ver 3.1.0). They are even of the same version!
The blogger has uploaded both a configuration file and a programing software to CSDN, but only gives the download link to the parameters configuration file.
I have managed to find the download link for the programing software here.
Unfortunately, like most Chinese websites, CSDN requires credits to download.
Fortunately, there are many sellers on Taobao offering CSDN downloading service which costs less than 3¥ for however many credits CSDN requires.
To save trouble, I have decided to offer it here. You’d better have it scanned by some antivirus software for safety concern:)
As for the USIM reader, any PC/SC compatible smart card reader will do.

Program the USIM Card

On Windows 10, just plug in the smart card reader and Windows will take care of installing the drivers needed.
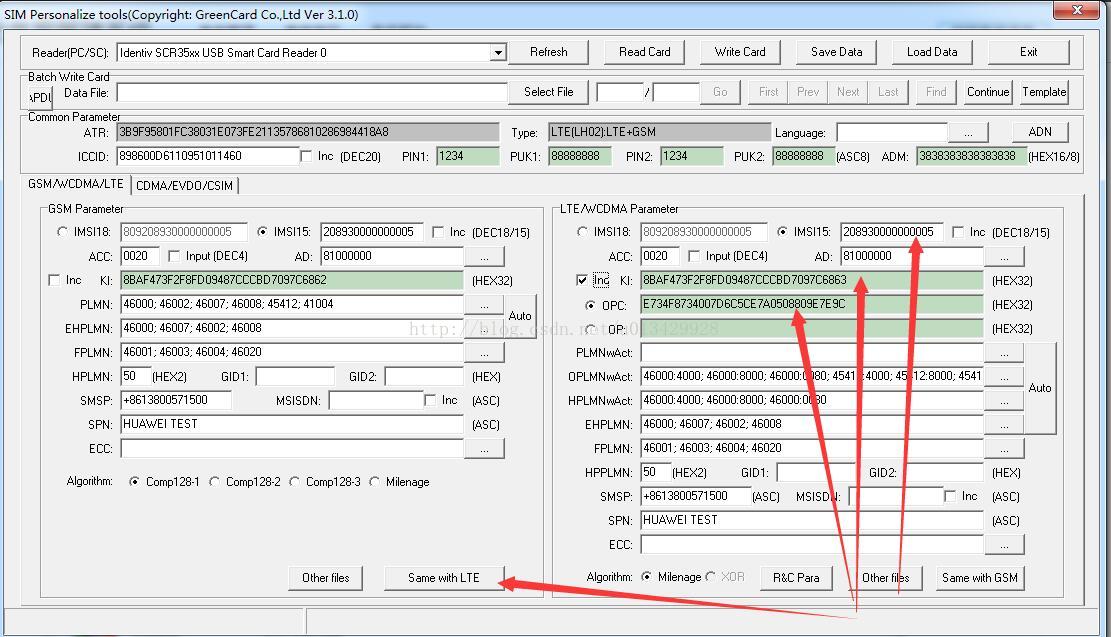
Then, open SIM Personalize tools GRSIMWrite.exe, click Read Card, it should be able to read the parameters stored without error.
Programming Card
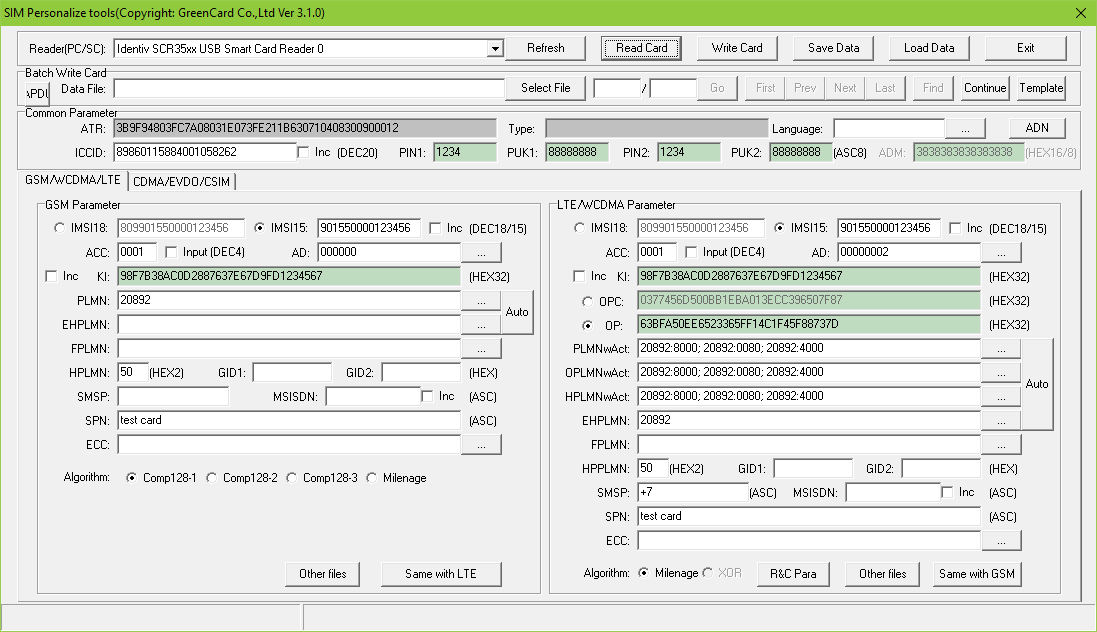
Next, write the card as you like.
For srsLTE, make sure the IMSI, KI and OP values are identical with those in the user_db.csv file.

Enbale IP Network

With the USIM card programmed above, you should be able to connect to LTE network.
To surf the Internet:
cd ~/srsLTE/srsepc
sudo su
./if_masq.sh [Interface for Internet connection]
You can get all the network interfaces of your machine with ifconfig, make sure you give if_masq.sh the name of the interface which connects to the Internet.
Note: DO NOT run if_masq.sh with sudo, it will not work on Ubuntu.
srsEPC creates a virtual network interface srs_spgw_sgi with the IP address 172.16.0.0/24. Your phone should be able to get an IP address like 172.16.0.2.
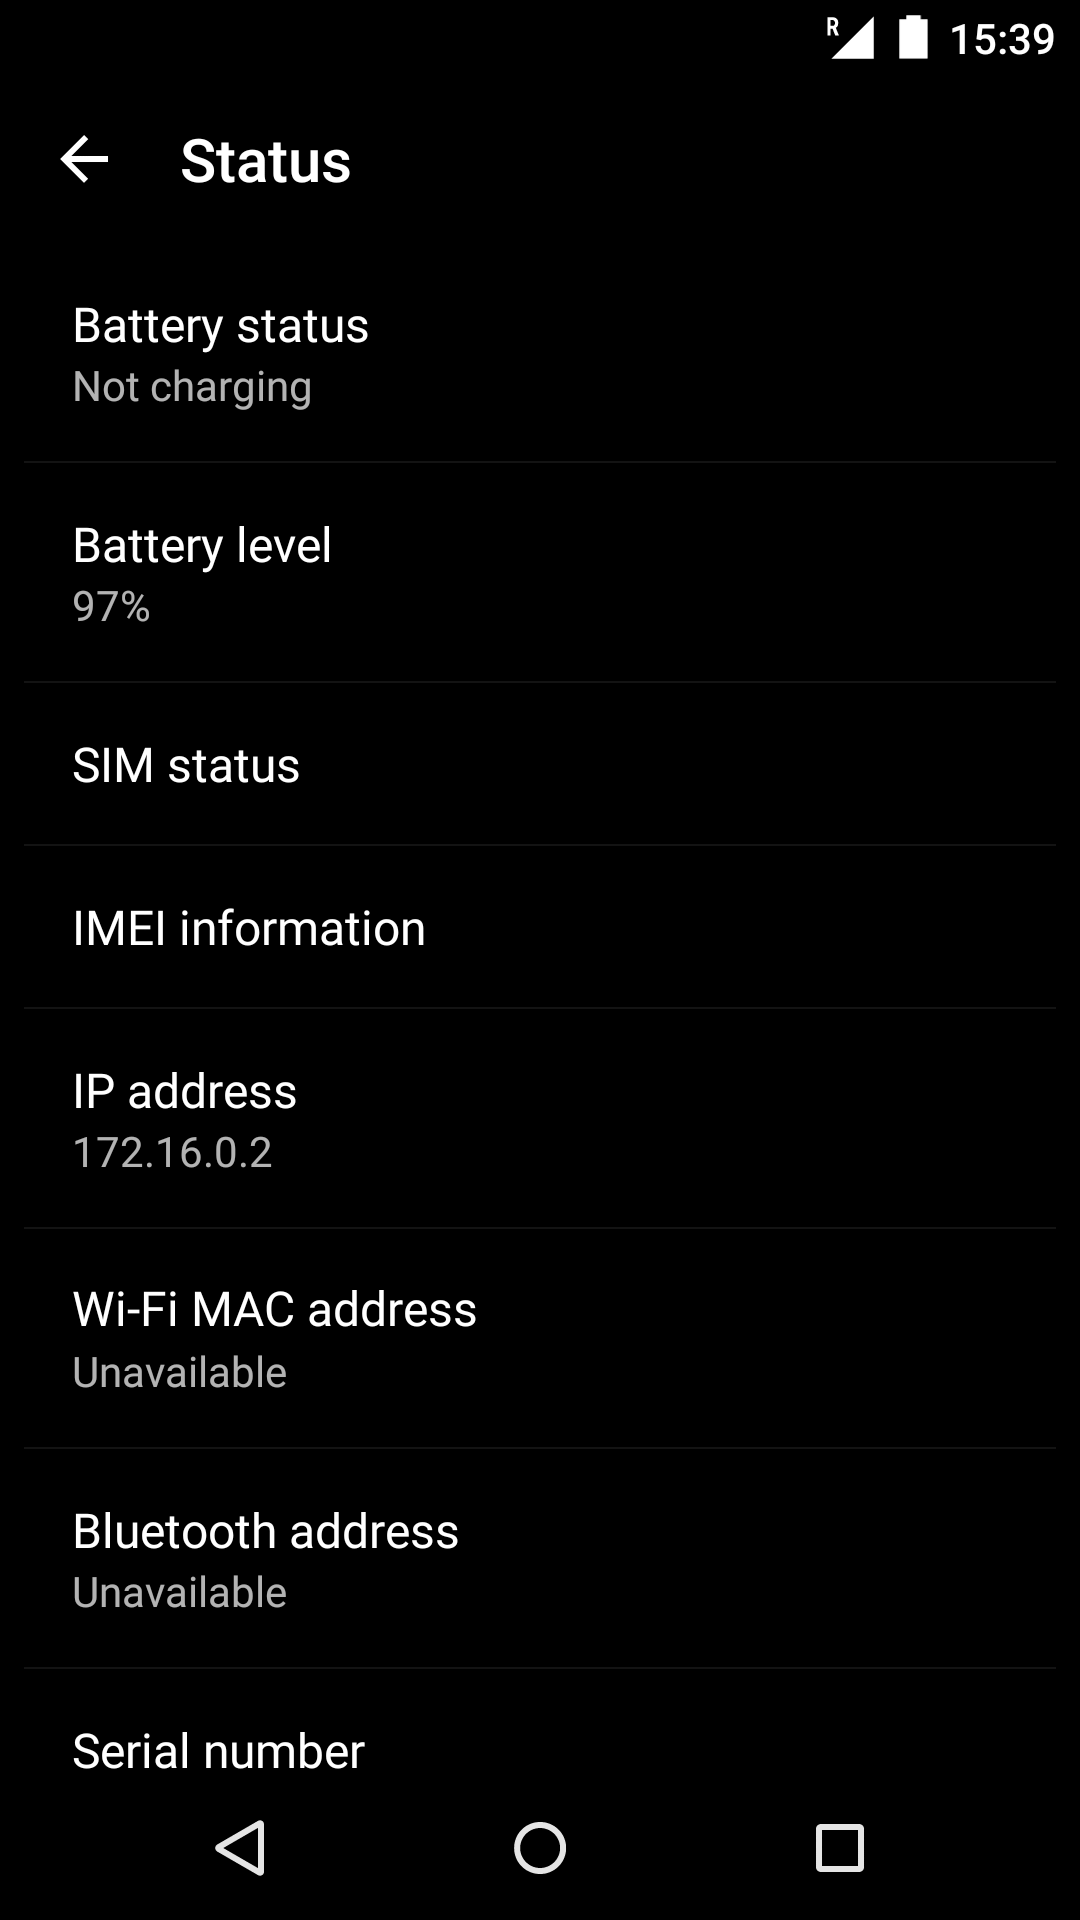
UE IP
The if_masq.sh script enables IP forward for our Ubuntu system and masquerades traffic from srs_spgw_sgi by the interface which connects to the Internet.
Next, add an Access Point Names(APN) in the Cellular network settings of your phone.
UE APNUE APN Setting
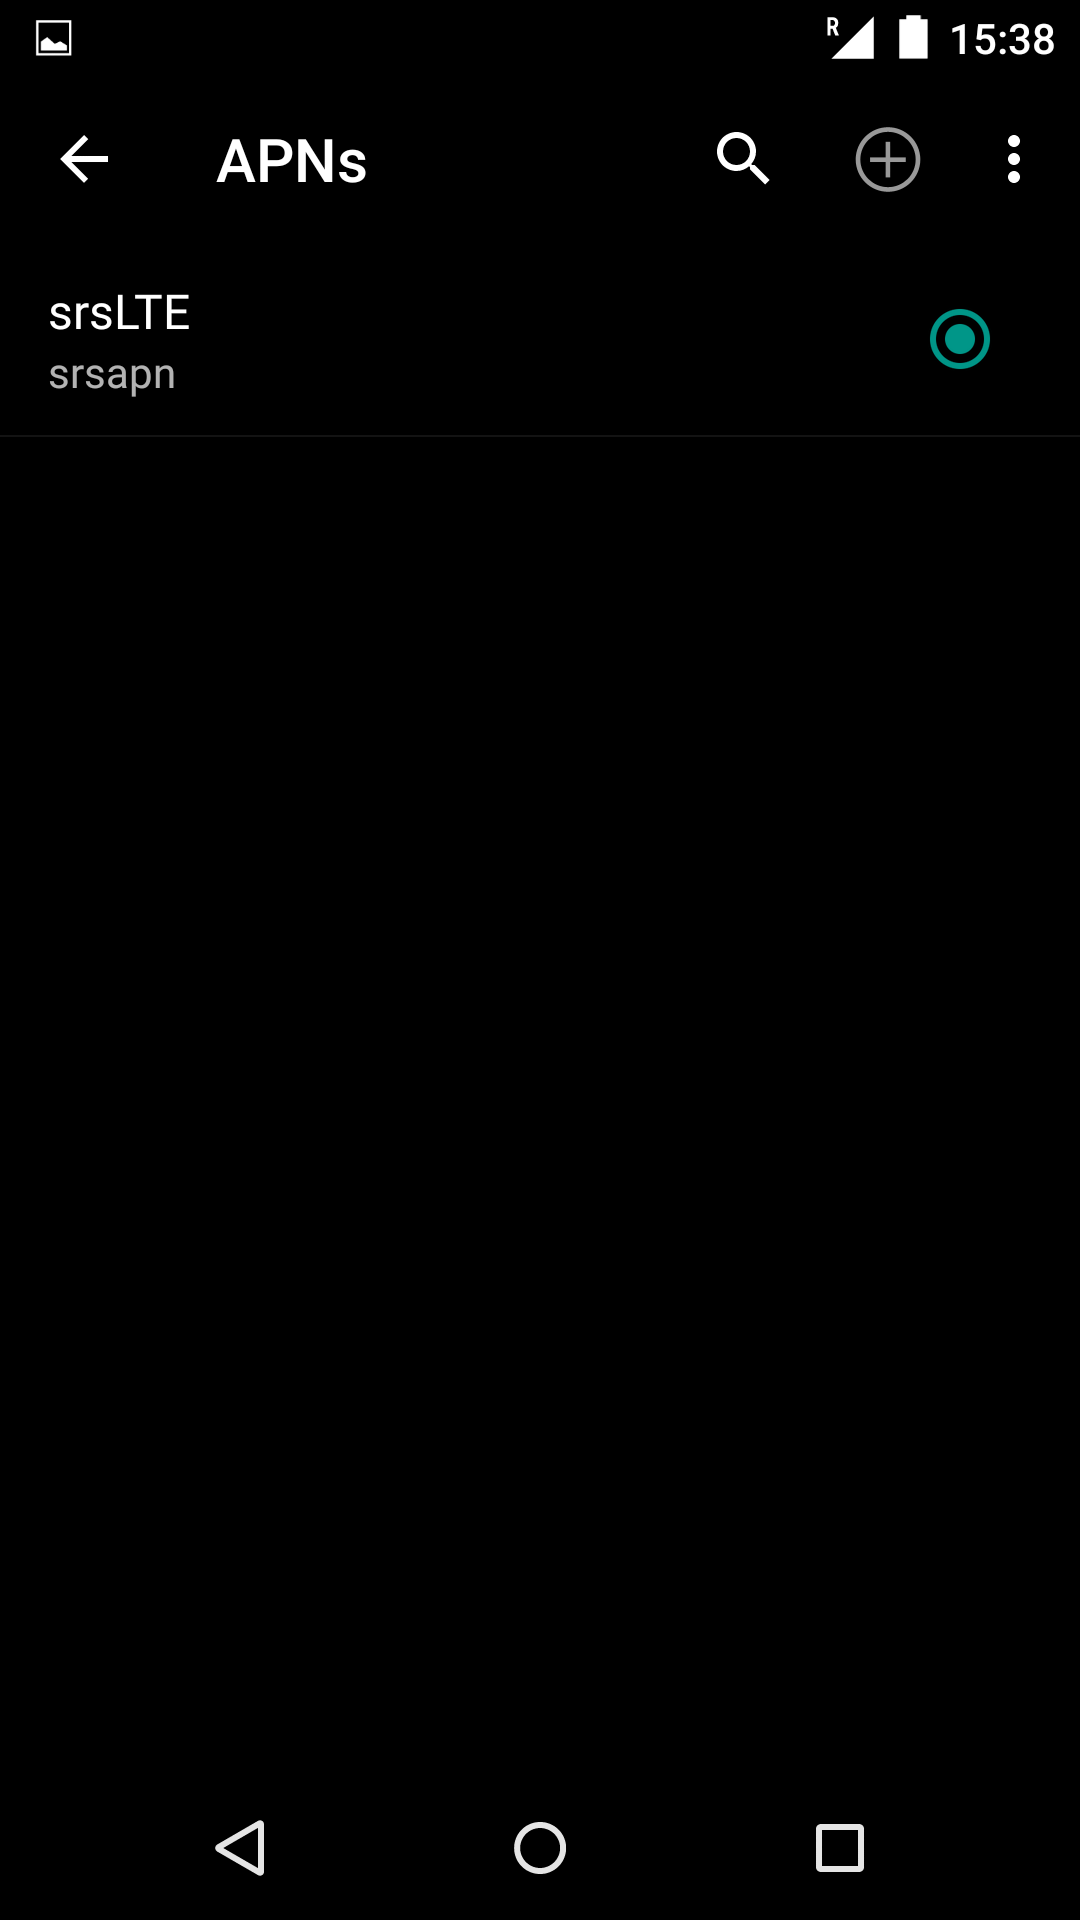
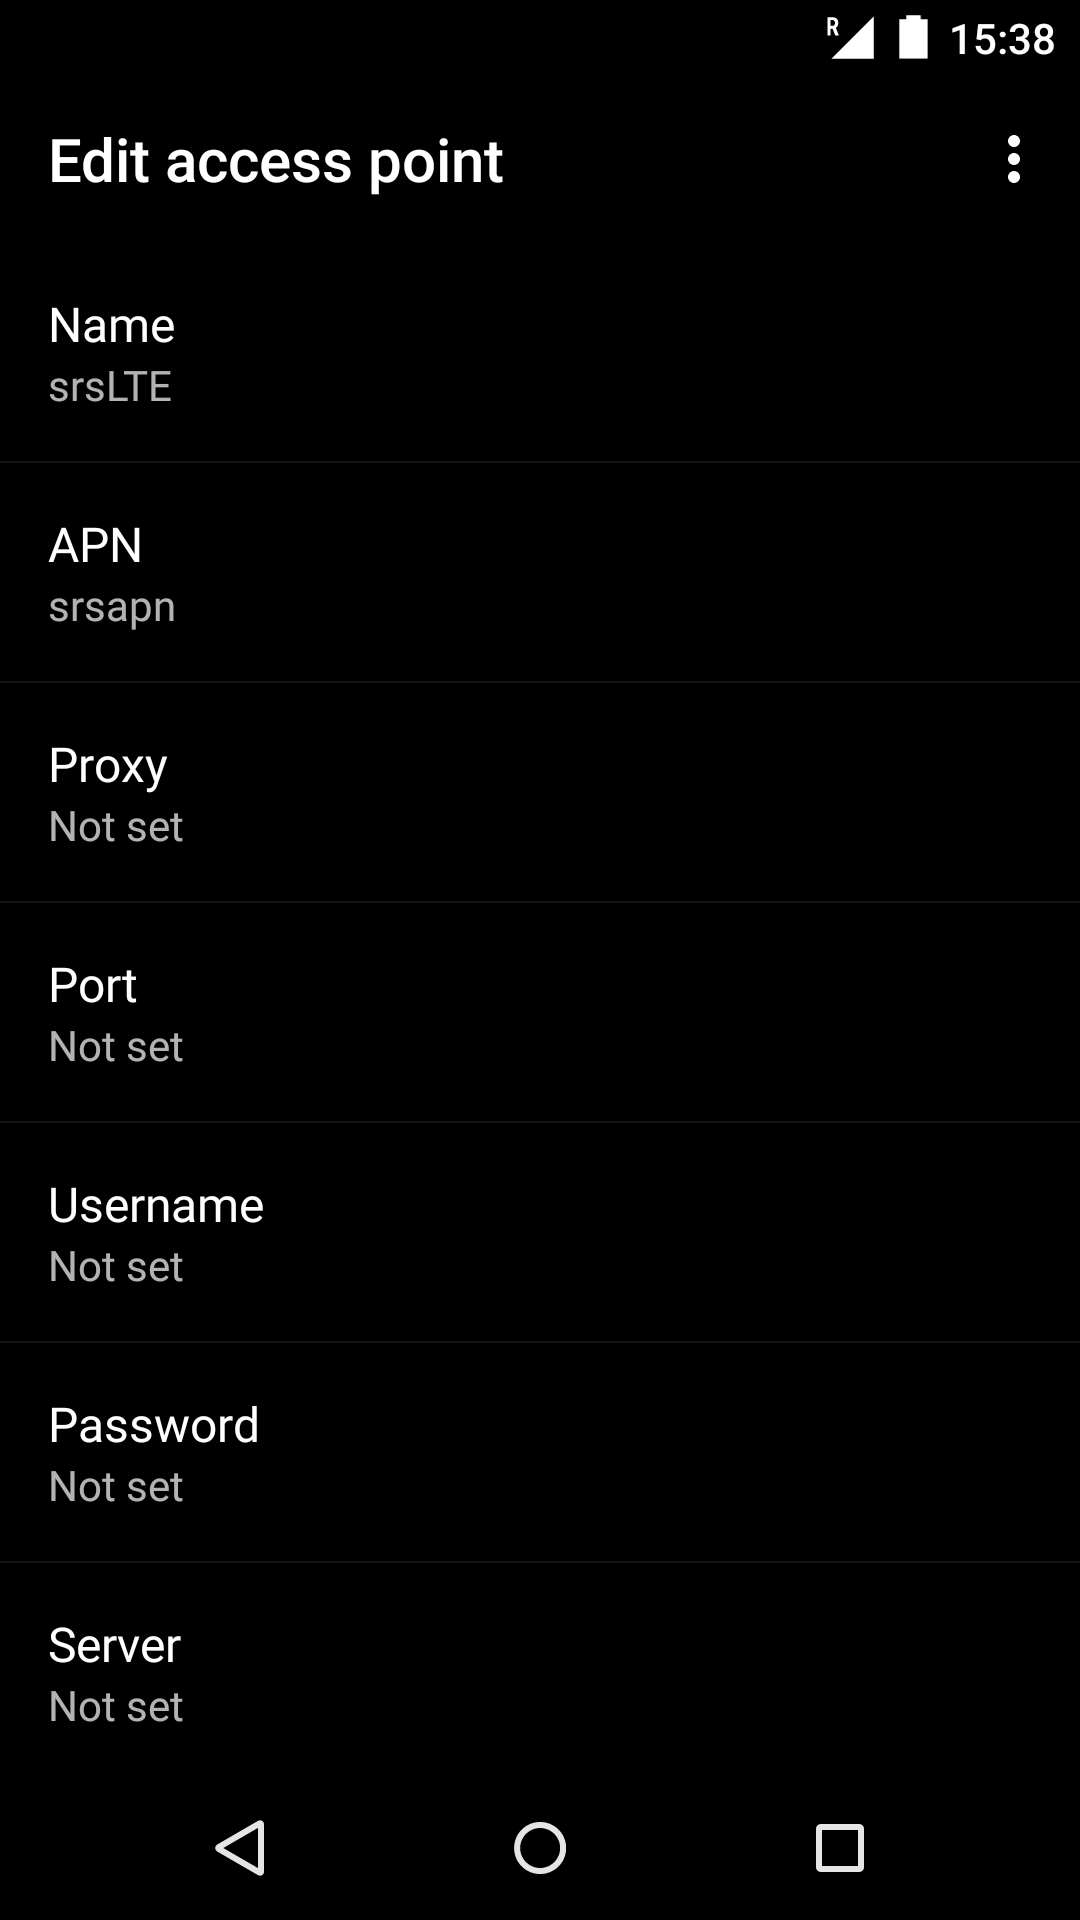
Only two fields need to be filled, the first name can be anything you like; the second APN needs to be the same with settings in epc.confsrsapn by default.
Now, you can surf the Internet by the custom built LTE network, just like Wi-Fi!
The Verizon service provider name(SPN) value is set in the USIM card.
UE Lock Screen
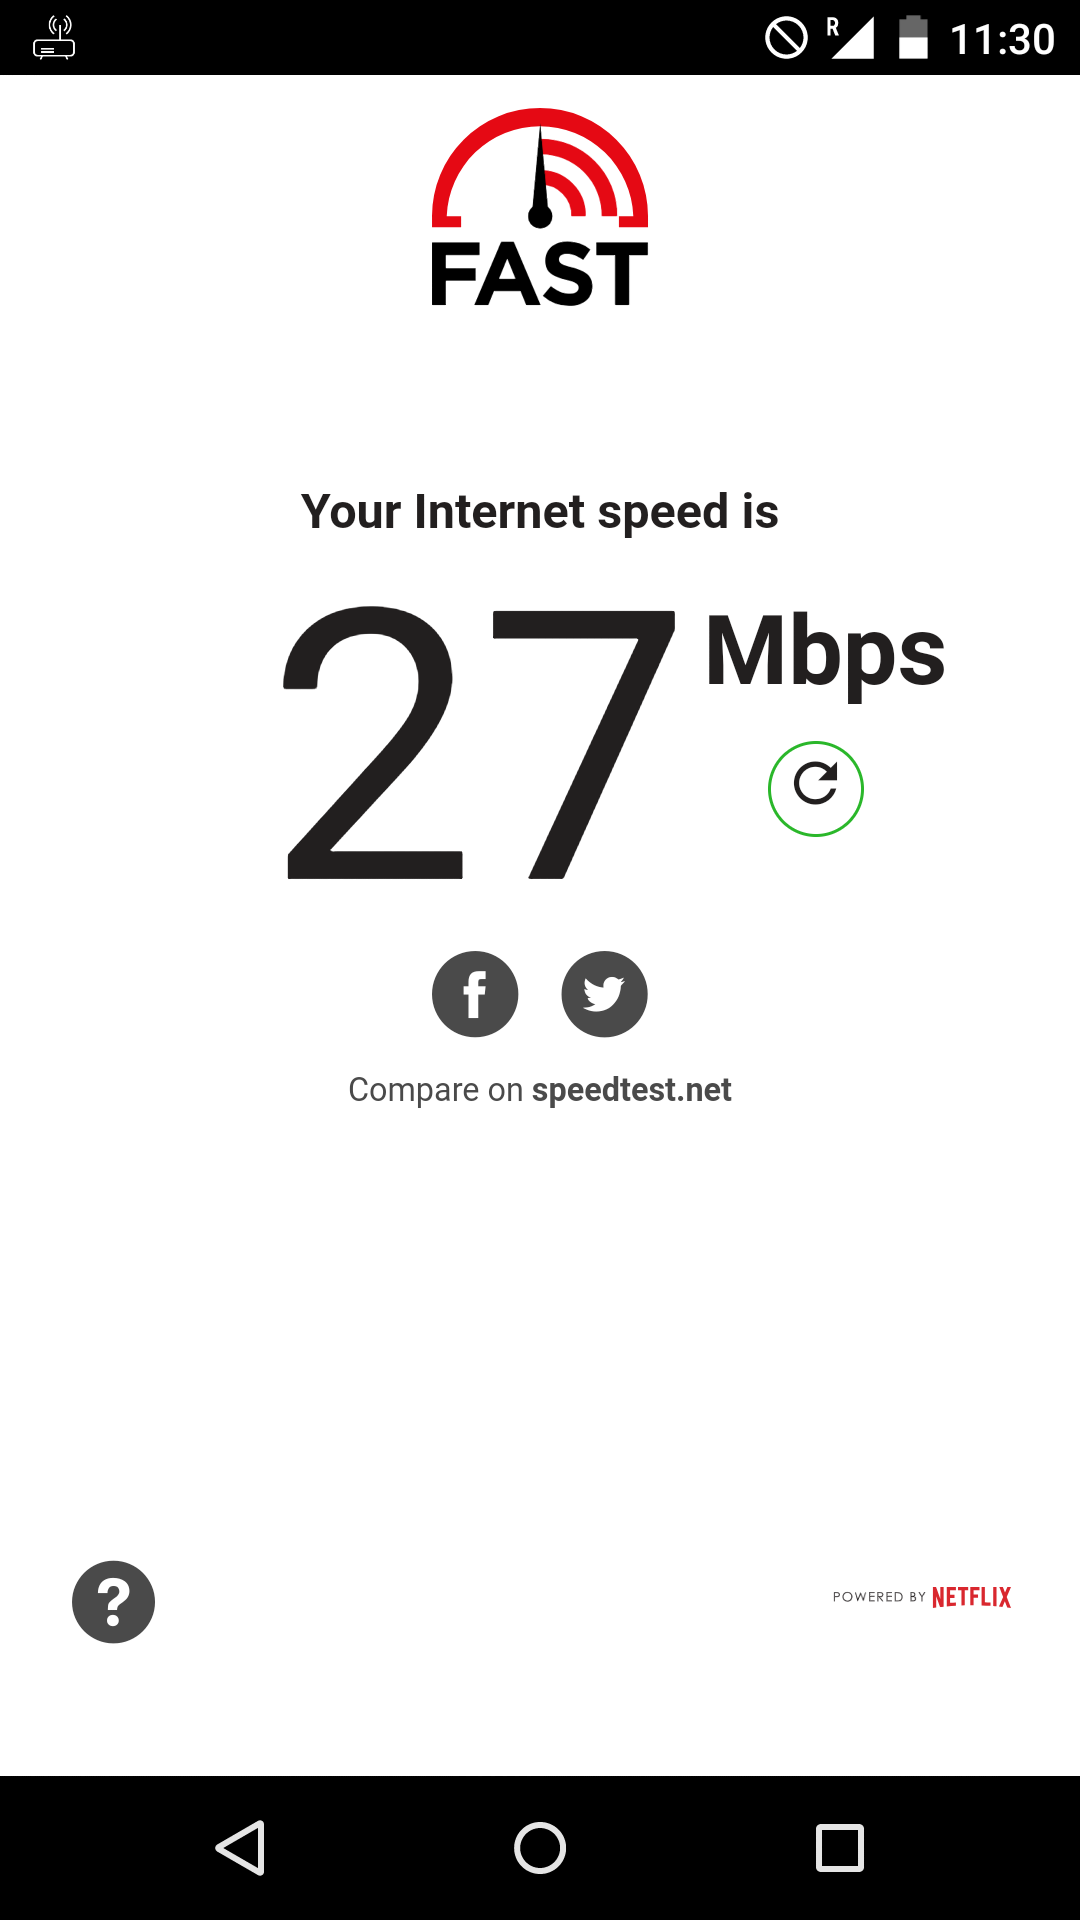
Speed test with FAST Speed Test from Netflix.
Speed Test

Reference

2018년 12월 2일 일요일

Install OpenLTE on Ubuntu wih USRP B210

referred from https://www.tansokun920.com/entry/2018/05/30/232201

1. Prerequisite
- USRP B210 (strong recommendation, you can use your own USRP or SDR, but it needs some level of modification).
- Powerful computer (CPU Intel i5, i7 or equivalent / RAM 8GB+ / USB3.0 interface / Ubuntu 14.04 or later).

2. You have to know
- Using licensed spectrum without permission is ILLEGAL on most of the countries in the world.

3. Install Ubuntu
- I installed Ubuntu 16.04, (I tried 14.04, 17.04, 18.04 - unless you have special preference you 16.04 just use 16.04 it will save your days maybe weeks).
- Don't use VM, its performance drops dramatically in VM.

4. Install OpenLTE
Once your Ubuntu is ready, you can install openLTE, basically follows below.
https://sourceforge.net/p/openlte/wiki/Home/
https://kb.ettus.com/Building_and_Installing_the_USRP_Open-Source_Toolchain_(UHD_and_GNU_Radio)_on_Linux

4.1 install GNURADIO
- $sudo apt-get update
-$sudo apt-get -y install git swig cmake doxygen build-essential libboost-all-dev libtool libusb-1.0-0 libusb-1.0-0-dev libudev-dev libncurses5-dev libfftw3-bin libfftw3-dev libfftw3-doc libcppunit-1.13-0v5 libcppunit-dev libcppunit-doc ncurses-bin cpufrequtils python-numpy python-numpy-doc python-numpy-dbg python-scipy python-docutils qt4-bin-dbg qt4-default qt4-doc libqt4-dev libqt4-dev-bin python-qt4 python-qt4-dbg python-qt4-dev python-qt4-doc python-qt4-doc libqwt6abi1 libfftw3-bin libfftw3-dev libfftw3-doc ncurses-bin libncurses5 libncurses5-dev libncurses5-dbg libfontconfig1-dev libxrender-dev libpulse-dev swig g++ automake autoconf libtool python-dev libfftw3-dev libcppunit-dev libboost-all-dev libusb-dev libusb-1.0-0-dev fort77 libsdl1.2-dev python-wxgtk3.0 git-core libqt4-dev python-numpy ccache python-opengl libgsl-dev python-cheetah python-mako python-lxml doxygen qt4-default qt4-dev-tools libusb-1.0-0-dev libqwt5-qt4-dev libqwtplot3d-qt4-dev pyqt4-dev-tools python-qwt5-qt4 cmake git-core wget libxi-dev gtk2-engines-pixbuf r-base-dev python-tk liborc-0.4-0 liborc-0.4-dev libasound2-dev python-gtk2 libzmq-dev libzmq1 python-requests python-sphinx libcomedi-dev python-zmq

*modify the command based on your Ubuntu version (https://kb.ettus.com/Building_and_Installing_the_USRP_OpenSource_Toolchain_(UHD_and_GNU_Radio)_on_Linux)

4.1.1 Building and installing UHD from source code
-4.1.1.1, make a folder to hold the repository.
      cd $HOME mkdir workarea-uhd cd workarea-uhd

-4.1.1.2, clone the repository and change into the cloned directory.
      git clone https://github.com/EttusResearch/uhd cd uhd

-4.1.1.3, checkout the desired UHD version. You can get a full listing of tagged releases by running the command:
      git tag -l
      
      Example truncated output of git tag -l:
$ git tag -l ... release_003_009_004 release_003_009_005 release_003_010_000_000

      Example: For UHD 3.11.0.1: (*what I did and working version)
      git checkout release_003_011_000_001

-4.1.1.4, create a build folder within the repository.
      cd host mkdir build cd build

-4.1.1.5, invoke CMake to create the Makefiles.
      cmake ../

-4.1.1.6, run Make to build UHD.
      make

-4.1.1.7, you can optionally run some basic tests to verify that the build process completed properly.
   make test 
 
-4.1.1.8, install GNU Radio, using the default install prefix, which will install GNU Radio under the /usr/local/lib folder. You need to run this as root due to the permissions on that folder.
      sudo make install

-4.1.1.9, update the system's shared library cache.
   sudo ldconfig
 
-4.1.1.10, make sure that the LD_LIBRARY_PATH environment variable is defined and includes the folder under which UHD was installed. Most commonly, you can add the line below to the end of your $HOME/.bashrc file:
      export LD_LIBRARY_PATH=/usr/local/lib

-4.1.1.11 If the LD_LIBRARY_PATH environment variable is already defined with other folders in your $HOME/.bashrc file, then add the line below to the end of your $HOME/.bashrc file to preserve the current settings.
export LD_LIBRARY_PATH=$LD_LIBRARY_PATH:/usr/local/lib

-4.1.1.12 For this change to take effect, you will need to close the current terminal window, and open a new terminal.
At this point, UHD should be installed and ready to use. You can quickly test this, with no USRP device attached, by running uhd_find_devices. You should see something similar to the following.
       uhd_find_devices

Below is my example, mine is B210
       [INFO] [UHD] linux; GNU C++ version 5.4.0 20160609; Boost_105800;      UHD_3.11.0.HEAD-0-ga1b5c4ae
--------------------------------------------------
-- UHD Device 0
--------------------------------------------------
Device Address:
    serial: XXXXXXXX
    name: MyB210
    product: B210
    type: b200


4.1.2 Configuring USB
On Linux, udev handles USB plug and unplug events. The following commands install a udev rule so that non-root users may access the device. This step is only necessary for devices that use USB to connect to the host computer, such as the B200, B210, and B200mini. This setting should take effect immediately and does not require a reboot or logout/login. Be sure that no USRP device is connected via USB when running these commands.
    cd $HOME/workarea-uhd/uhd/host/utils
    sudo cp uhd-usrp.rules /etc/udev/rules.d/
    sudo udevadm control --reload-rules sudo udevadm trigger

4.1.3 Connect the USRP
The installation of UHD and GNU Radio should now be complete. At this point, connect the USRP to the host computer.
If the interface is USB, then open a terminal window, and run "lsusb". You should see the USRP listed on the USB bus with a VID of 2500 and PID of 0020, 0021, 0022, for B200, B210, B200mini, respectively. Also try running "uhd_find_devices" and "uhd_usrp_probe".

4.2. Install PolarSSL 
4.2.1 recommended command but failed in my case
$ sudo apt-get install libpolarssl-dev

wget  http://launchpadlibrarian.net/195987839/libpolarssl7_1.3.9-2.1_amd64.deb
wget http://launchpadlibrarian.net/195987837/libpolarssl-dev_1.3.9-2.1_amd64.deb
$ sudo dpkg -i libpolarssl7_1.3.9 -2.1_ amd64 . deb
$ sudo dpkg -i libpolarssl-dev_1.3.9-2.1_ amd64 . deb

4.3 Install openLTE
Download latest version from the link https://sourceforge.net/projects/openlte/files/
- I downloaded "openlte_v00-20-05.tgz" and unzip it
- tar -xvzf openlte_v00-20-05.tgz

4.4 Install osmocom Gnu Radio Blocks
https://osmocom.org/projects/gr-osmosdr/wiki/GrOsmoSDR

GNURADIO INSTALL
https://github.com/gnuradio/gnuradio

$pybombs prefix init ~/prefix/default/ --> $pybombs prefix init /home/ai2s/prefix